Decide you want to move a widget? Just drag and drop it to a new location. Need more space for widgets? Increase the number of rows and columns for the GridLayout using the Properties, or right-click within a GridLayout cell and select Insert to add a row or column above or below the current cell. (You can also Delete rows and columns via right-clicking on the GridLayout.)

One of our favorite features of the Rich UI editor is the ability to auto-generate a UI based on an EGL variable. You can drag-and-drop an EGL variable, such as a record type, from the EGL Data view to the Design view. The Insert Data wizard let's you select the fields to appear along with label, widget type and name.
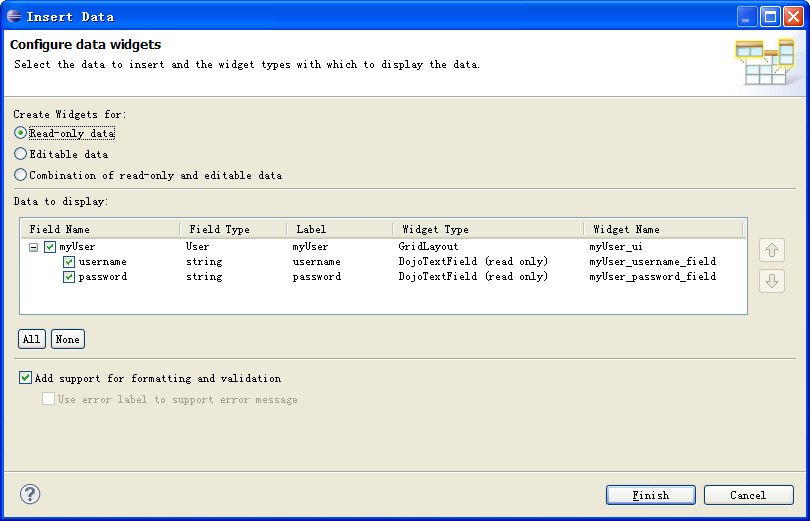
To help you get started using the Rich UI editor, members of our development team in China have developed a tutorial to Create a Rich UI logon page. This tutorial is a good way to familiarize yourself with the Rich UI editor for EGL. The tutorial covers using the Insert Data wizard as a quick way to create the UI from a record, as well as creating an event handler and testing the page using Preview.
Theresa
No comments:
Post a Comment